IntroductionThis document explains the various steps involved in the distribution of an iOS app. During the development lifecycle of an iOS app, it has to be distributed to various stakeholders for continued feedback.
Once the app is completely developed and tested, it has to be submitted to the AppStore. This document explains each and every step involved in the process of App Submission to the AppStore and distribution to a limited set of users.
Distributing the App to a limited set of users
Before distributing the application to the Appstore the application has to be thoroughly tested on real devices. The IPA file has to be distributed to the QA team for extensive testing. After becoming a member of the Apple developer program, the IPA fill should be archived. This IPA file will be then distributed to the QA team via test flight.
Publishing to AppStore
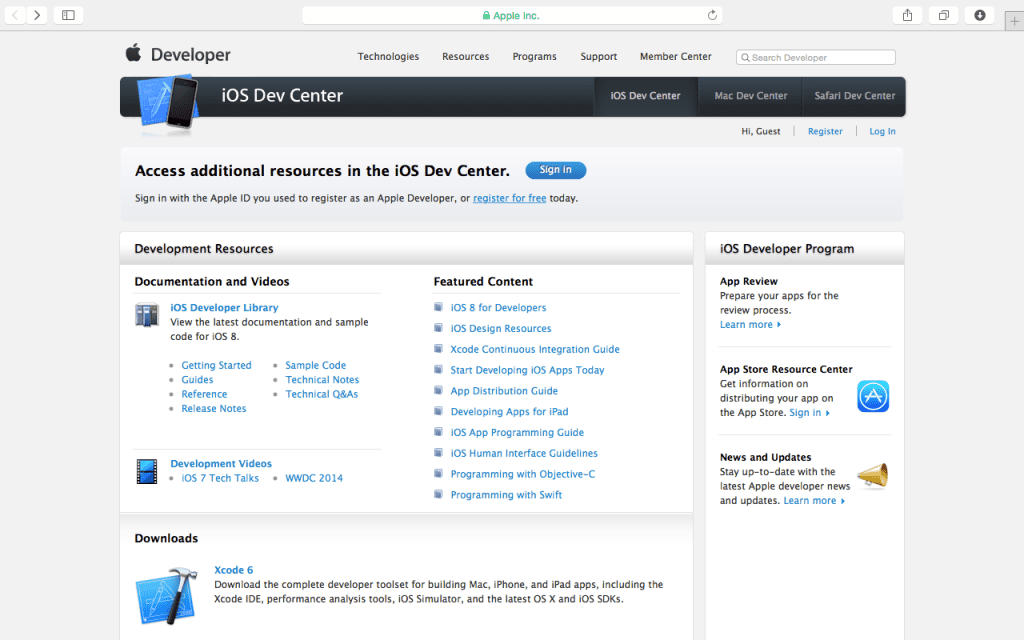
Getting StartedThe first step on the path to the App Store is to register as an Apple developer. Note that becoming an Apple developer is free and is not the same as becoming an iOS developer, for which we must pay a US$99 fee.
If you don’t yet have an Apple developer account, go to the iOS Dev Center and click the “register” link:
On the next page, we can choose to create a completely new Apple ID or use an existing one. If you want, you can save time and use the Apple ID you already use for your iTunes purchases, for example. But I’d suggest creating a new, clean ID. It helps ensure all your data is correct, and it keeps your personal and professional lives separate.So, select “Create an Apple ID” and click “Continue”:
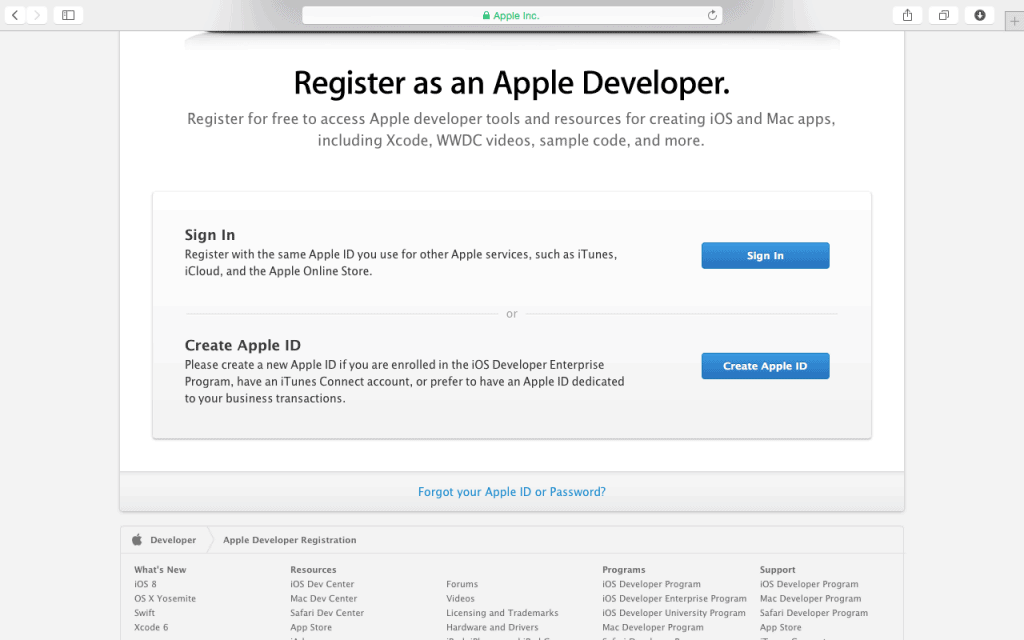
Fill in your email, password, and security information to create an Apple developer account.Now go to the Developer Member Center, log in to register, and you need to pay US$99. After submitting and paying for your iOS Developer registration, you’ll need to wait a day or so for Apple to process your order.Now we’re going to focus on two portals that we’ll use a lot when developing your apps, the iOS Provisioning Portal and iTunes Connect.iOS Provisioning PortalThis portal allows us to generate what Apple calls “profiles.” Profiles, sometimes called “code signing identities,” are files generated by the portal that allows Xcode to sign our apps in a way that our devices’ iOS will identify as valid.
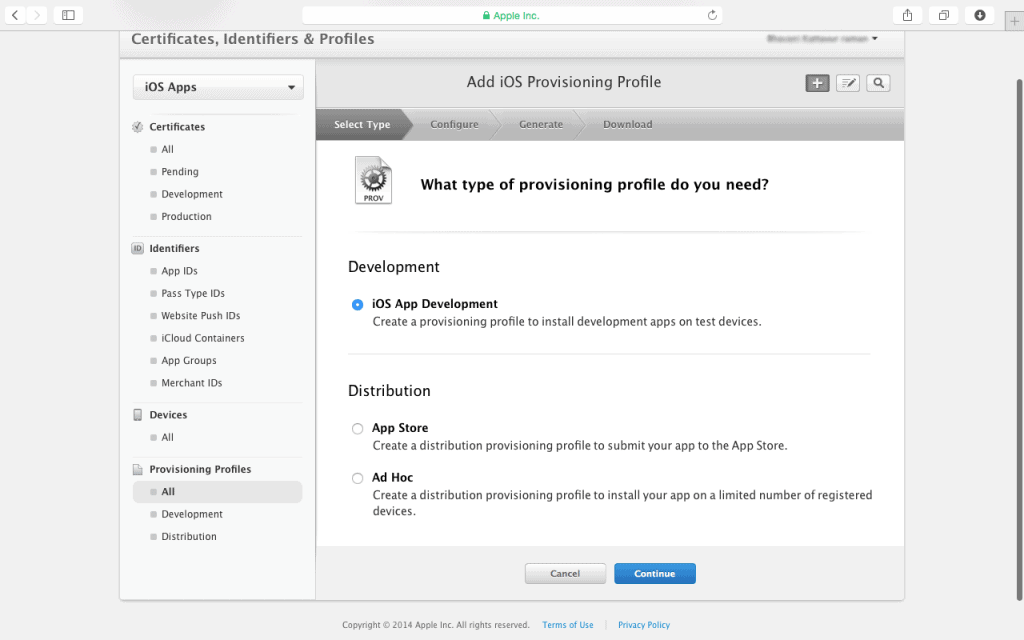
There are two types of profiles:
- Development profiles. These are tied to specific devices, so the app can only run on those devices.
- Distribution profiles. These are used to sign our app before we submit it to Apple for approval. They contain no device-specific information, but we can’t use them to install apps on any device ourselves, because Apple still has to sign the app after the approval process.
Requesting the certificates
In this step, we are going to generate and request two certificates one for development and one for distribution. We only need to do this once (not for each app!).
Now that you’re enrolled in the Apple developer program, you can launch Xcode and go to your preferences menu. Then go to the “Accounts” tab. Fill in your Apple iOS developer account details here.
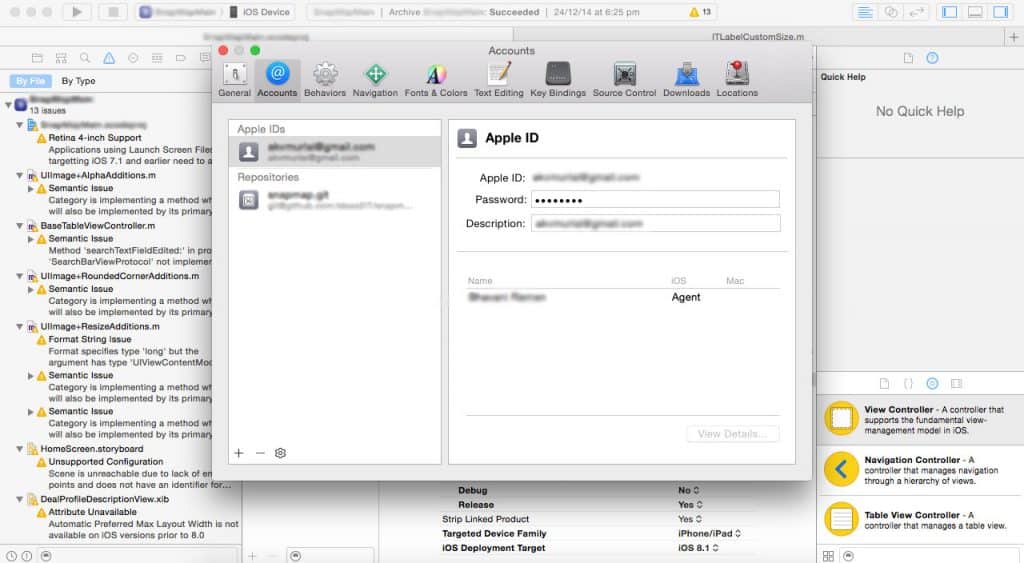
Once you’re signed in, click “View Details…” and you’ll get to this panel where you can see your existing certificates and provisioning profiles.If you click the “+” icon below the certificates pane, you can request a new iOS Development Certificate. Go ahead and do that now.Also, do the same thing and request an iOS Distribution Certificate as well.
Before we can install the app on our device for testing, we’ll need to do a few things:
1. Configure the device for development and add the device to the member center
2. Create a provisioning profile for your app
3. Make sure your app is set to use that provisioning profile
4. Finally deploy the app to the device
Adding the device to the member centerAll we need to do here is plug in the iPhone or iPad to your computer with the USB cable. Go to iTunes and find your UDID and go back to the Apple developer portal under the devices section add your UDID by giving a suitable name.Creating a provisioning profileLogin to your iOS Provisioning Portal. it’s time to create the App ID and iOS provisioning profile for our app. In the provisioning portal, go to the App IDs section.
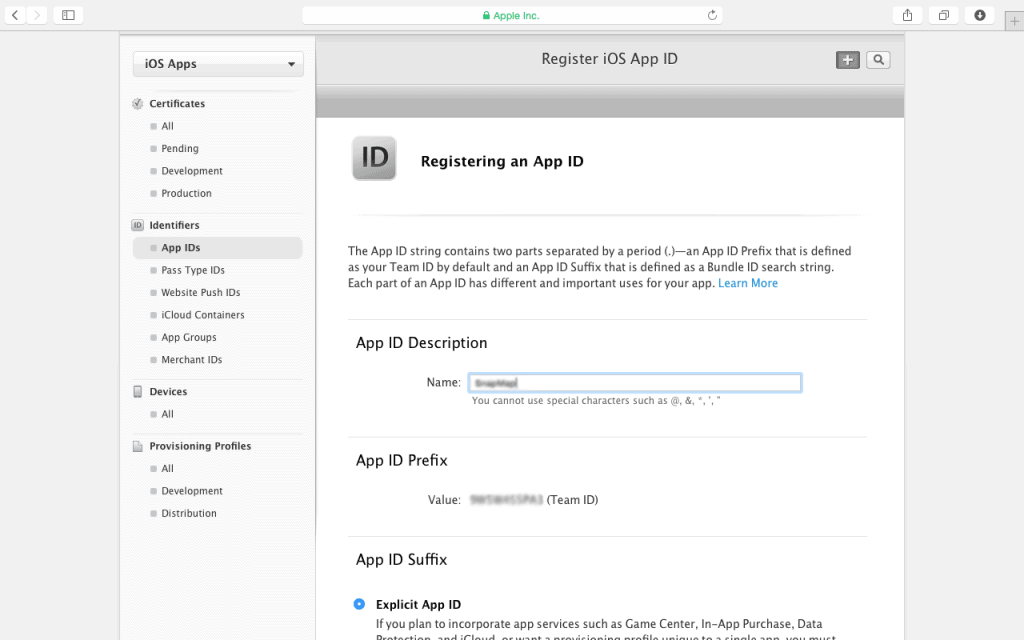
- Give your app a name and then scroll down a little to the explicit app id section and put in the same bundle identifier that you had set up for your Xcode project. Then click “Continue” and on the following confirmation screen, click “Submit”.
- Now go to the development provisioning profiles section. We’re going to create a new development iOS provisioning profile for the new App ID we just added.
- Choose iOS App Development for the type and click “Continue”.
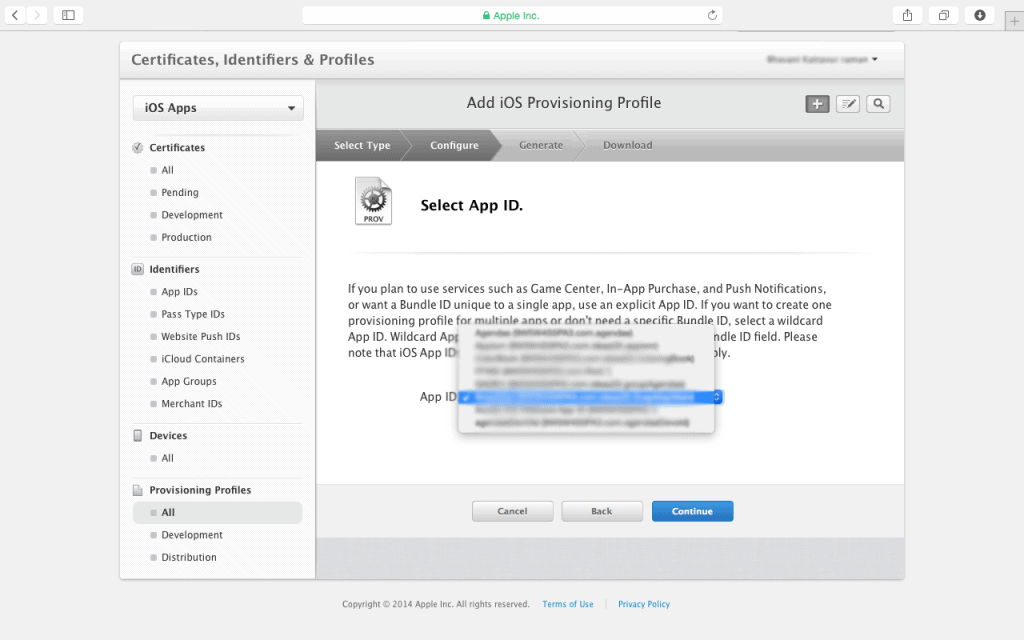
- On the next screen, choose the App ID that you just added in the drop-down.
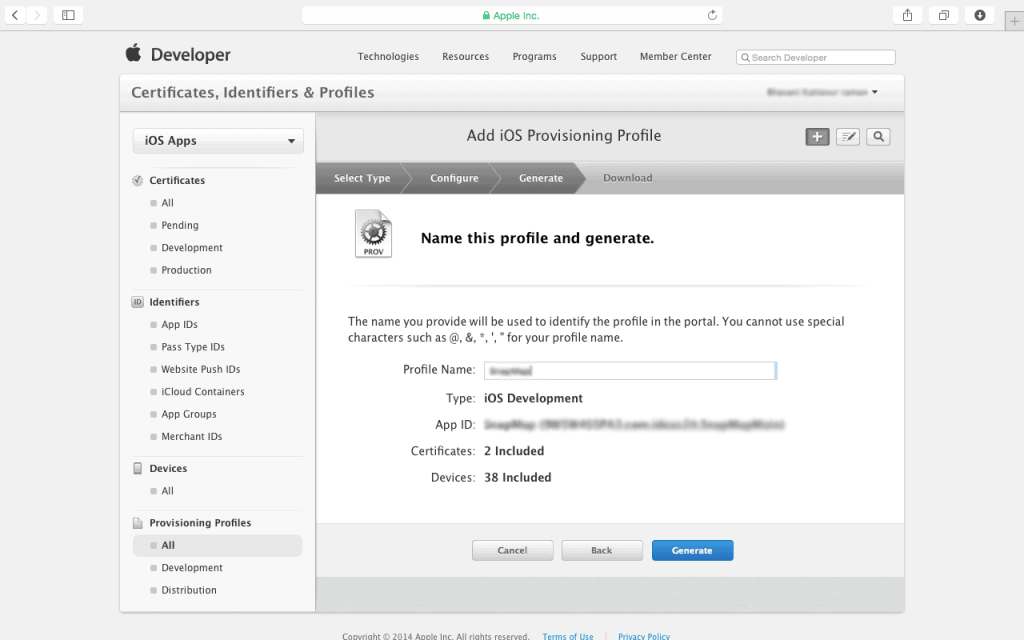
- On the next screen, select the development certificate and click “Continue”. Now, finally, you can select the devices that your app is allowed to be installed. On the final screen, you can give the provisioning profile a name and generate it.
- Click the blue Download button and the profile will be downloaded onto your computer. Go to the location where you saved it and then double-click the provisioning profile.
- Next click on the root project node in your Xcode file navigator and on the right pane you’ll see the settings for your project.
- Click the Build Settings tab and scroll down to the Code Signing part.
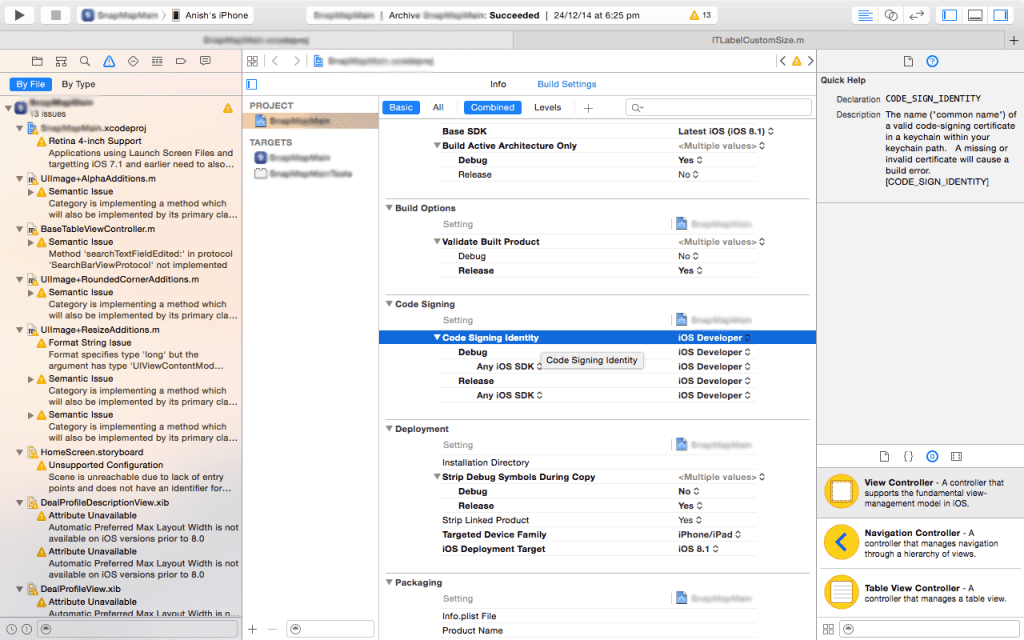
- Both of these settings are automatic settings, meaning they’ll automatically select the signing identity to use. If you’ve only got one development and one distribution signing identity (which is most likely since you just requested one of each in step 1), then this automatic setting is ok, but if you have multiple signing identities then it may be best to explicitly select the signing identity that you want to use.
Creating Distribution Provisioning Profile
Previously we created a development provisioning profile. Well, now we’re going to create a distribution provisioning profile.
- Login to your iOS Developer Provisioning Portal and go to the Distribution Provisioning Profiles section.
- Click the Plus icon in the upper right to create a new profile and then choose App Store as the type. Click “Continue. Select your App ID from the drop-down list and click “Continue”. Follow the same steps as mentioned in creating the development provisioning profile and installing it.
Build an App Archive
- Open up your app project in Xcode. Once submitted, our app will go through a certification and app store review process to ensure that it doesn’t violate any rules, that it functions well, and is not malicious.
- The latest app store review guidelines on how Apple reviews your app is located here App Review Guidelines.
- After ensuring that our app follows those guidelines, click the root node of our project in the file navigator to go to the project settings.
- Then click the Build Settings tab and scroll down to the Code Signing section.

- Choose the iOS Distribution setting. Now, we want to create a Release build and submit it to the App Store.
- Change the deployment target to iOS Device
- Then go up to the Product menu item and select Archive. Your app archive will be created and the Xcode Organizer will launch, showing you all the archives that you’ve created in the past.
- At this point, we need to switch gears and go into the iTunes Connect portal to set up our App Store listing with all of the information. After that, we’ll go back into the Xcode Organizer and submit the app through Xcode.
Creating an AppListing in iTunesConnect
Apple iTunes Connect is a dashboard that allows you to manage your apps, view reports of your performance in the App Store, manage your contracts, and more. When you enroll in the iPhone developer program, you’ll have access to iTunes Connect as well.
- Click My Apps and then click the blue Add New App button.
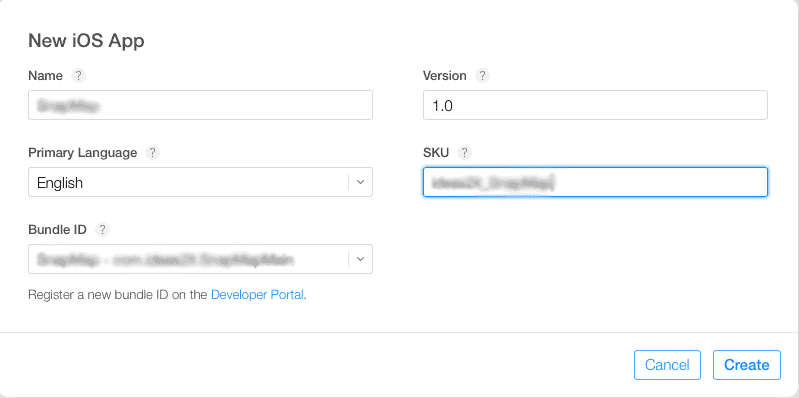
Select the bundle ID that corresponds to the app that we want to submit and type in an app name.
- SKU Number: This is just for our own reference or cataloging.
- Version Number: Fill in the same version number as you have in the project info settings of your app.
- After entering the information, click Continue.
- App Availability and Pricing
- For pricing, if we’re going to be selling our app for a price higher than Free, we’ll have to sign some contracts and add a bank account in order to get paid. It will be available in “Contracts, Tax, and Banking” in the iTunes Connect dashboard.
- Copyright: WE can fill in something like “2014 Ideas2it” (substituting your own values for year and name)
- Primary Category and Secondary Category: Select the most appropriate categories for our app.
- Rating: Answer the questions they ask and the rating for your app will be determined.
- Description: This will be the description that’s shown for our app in the iTunes App Store. We want to be descriptive but don’t be deceptive or we won’t pass certification because of misrepresentation.
- Keywords: Fill in the keywords that we want our app to show up for. We only have 100 characters so don’t use any spaces.
- Support, Marketing, and Privacy Policy URLs: We’ve got a website or somewhere we can direct users to in order to find the aforementioned pieces of information.
- Contact Information: If the app reviewer needs to contact you, they’ll reach you with this information.
- Uploads: Provide the art assets for our app listing in the App Store. Click the question mark bubbles to find the dimensions required for our assets.
- Click Save and you’ll see the status change to Waiting For Upload.
- Open the organizer. Go to your Archives tab and select the archive that you created earlier for upload. Then click Distribute.
- Use our iTunes Connect login to sign in and it’ll look to make sure that we created a matching App Listing. Then if all goes well with the validation, it’ll proceed to upload the binary for certification!
- After uploading the binary, if we go back to our iTunes Connect account, we’ll see the status of our app is now Waiting for Review.

It will take a few days to a week to get the app into the review process. Once the review is complete, we will receive a status email from Apple. (Here you can also quote the email text received from Apple for approval/rejection).


.png)


.png)


.webp)